Content from Introducing the Shell
Last updated on 2023-08-15 | Edit this page
Overview
Questions
- What is a command shell and why would I use one?
- How can I move around on my computer?
- How can I see what files and directories I have?
- How can I specify the location of a file or directory on my computer?
Objectives
- Describe key reasons for learning shell.
- Navigate your file system using the command line.
- Access and read help files for
bashprograms and use help files to identify useful command options. - Demonstrate the use of tab completion, and explain its advantages.
What is a shell and why should I care?
A shell is a computer program that presents a command line interface which allows you to control your computer using commands entered with a keyboard instead of controlling graphical user interfaces (GUIs) with a mouse/keyboard/touchscreen combination.
There are many reasons to learn about the shell:
- Many bioinformatics tools can only be used through a command line interface. Many more have features and parameter options which are not available in the GUI. BLAST is an example. Many of the advanced functions are only accessible to users who know how to use a shell.
- The shell makes your work less boring. In bioinformatics you often need to repeat tasks with a large number of files. With the shell, you can automate those repetitive tasks and leave you free to do more exciting things.
- The shell makes your work less error-prone. When humans do the same thing a hundred different times (or even ten times), they’re likely to make a mistake. Your computer can do the same thing a thousand times with no mistakes.
- The shell makes your work more reproducible. When you carry out your work in the command-line (rather than a GUI), your computer keeps a record of every step that you’ve carried out, which you can use to re-do your work when you need to. It also gives you a way to communicate unambiguously what you’ve done, so that others can inspect or apply your process to new data.
- Many bioinformatic tasks require large amounts of computing power and can’t realistically be run on your own machine. These tasks are best performed using remote computers or cloud computing, which can only be accessed through a shell.
In this lesson you will learn how to use the command line interface to move around in your file system.
How to access the shell
On a Mac or Linux machine, you can access a shell through a program called “Terminal”, which is already available on your computer. The Terminal is a window into which we will type commands. If you’re using Windows, you’ll need to download a separate program to access the shell.
To save time, we are going to be working on a remote server where all the necessary data and software available. When we say a ‘remote server’, we are talking about a computer that is not the one you are working on right now. You will access the Carpentries remote server where everything is prepared for the lesson. We will learn the basics of the shell by manipulating some data files. Some of these files are very large , and would take time to download to your computer. We will also be using several bioinformatic packages in later lessons and installing all of the software would take up time even more time. A ‘ready-to-go’ server lets us focus on learning.
How to access the remote server
You can log-in to the remote server using the instructions
from the Introduction to Cloud Computing for Genomics lesson. Your
instructor will supply to you the ip_address and password
that you need to login.
Each of you will have a different ip_address. This will
prevent us from accidentally changing each other’s files as we work
through the exercises. The password will be the same for everyone.
After logging in, you will see a screen showing something like this:
OUTPUT
Welcome to Ubuntu 20.04.5 LTS (GNU/Linux 5.4.0-137-generic x86_64)

 * Documentation:  https://help.ubuntu.com
 * Management:     https://landscape.canonical.com
 * Support:        https://ubuntu.com/advantage

  System information as of Mon 13 Mar 2023 03:57:46 AM UTC

  System load:  0.0                Processes:             192
  Usage of /:   20.3% of 98.27GB   Users logged in:       0
  Memory usage: 25%                IPv4 address for eth0: 172.31.12.214
  Swap usage:   0%

  Get cloud support with Ubuntu Advantage Cloud Guest:
    http://www.ubuntu.com/business/services/cloud

178 updates can be applied immediately.
108 of these updates are standard security updates.
To see these additional updates run: apt list --upgradable


Last login: Fri Mar 10 03:14:44 2023 from 72.83.168.14
This provides a lot of information about the remote server that
you’re logging into. We’re not going to use most of this information for
our workshop, so you can clear your screen using the clear
command.
Type the word clear into the terminal and press the
Enter key.
This will scroll your screen down to give you a fresh screen and will make it easier to read. You haven’t lost any of the information on your screen. If you scroll up, you can see everything that has been output to your screen up until this point.
Tip
Hot-key combinations are shortcuts for performing common commands.
The hot-key combination for clearing the console is Ctrl+L.
Feel free to try it and see for yourself.
Navigating your file system
The part of the operating system that manages files and directories is called the file system. It organizes our data into files, which hold information, and directories (also called “folders”), which hold files or other directories.
Several commands are frequently used to create, inspect, rename, and delete files and directories.
Preparation Magic
You may have a prompt (the characters to the left of the cursor) that
looks different from the $ sign character used here. If you
would like to change your prompt to match the example prompt, first type
the command: echo $PS1 into your shell, followed by
pressing the Enter key.
This will print the bash special characters that are currently
defining your prompt. To change the prompt to a $ (followed
by a space), enter the command: PS1='$ ' Your window should
look like our example in this lesson.
To change back to your original prompt, type in the output of the
previous command echo $PS1 (this will be different
depending on the original configuration) between the quotes in the
following command: PS1=""
For example, if the output of echo $PS1 was
\u@\h:\w $, then type those characters between the quotes
in the above command: PS1="\u@\h:\w $ ". Alternatively, you
can reset your original prompt by exiting the shell and opening a new
session.
This isn’t necessary to follow along (in fact, your prompt may have other helpful information you want to know about). This is up to you!
The dollar sign is a prompt, which shows us that the shell is waiting for input; your shell may use a different character as a prompt and may add information before the prompt. When typing commands, either from these lessons or from other sources, do not type the prompt, only the commands that follow it.
Let’s find out where we are by running a command called
pwd (which stands for “print working directory”). At any
moment, our current working directory is our current
default directory, i.e., the directory that the computer assumes we want
to run commands in, unless we explicitly specify something else. Here,
the computer’s response is /home/dcuser, which is the top
level directory within our cloud system:
OUTPUT
/home/dcuserLet’s look at how our file system is organized. We can see what files
and subdirectories are in this directory by running ls,
which stands for “listing”:
OUTPUT
R r_data shell_datals prints the names of the files and directories in the
current directory in alphabetical order, arranged neatly into columns.
We’ll be working within the shell_data subdirectory, and
creating new subdirectories, throughout this workshop.
The command to change locations in our file system is
cd, followed by a directory name to change our working
directory. cd stands for “change directory”.
Let’s say we want to navigate to the shell_data
directory we saw above. We can use the following command to get
there:
Let’s look at what is in this directory:
OUTPUT
sra_metadata untrimmed_fastqWe can make the ls output more comprehensible by using
the flag -F, which tells ls
to add a trailing / to the names of directories:
OUTPUT
sra_metadata/ untrimmed_fastq/Anything with a “/” after it is a directory. Things with a “*” after them are programs. If there are no decorations, it’s a file.
ls has lots of other options. To find out what they are,
we can type:
man (short for manual) displays detailed documentation
(also referred as man page or man file) for bash commands.
It is a powerful resource to explore bash commands,
understand their usage and flags. Some manual files are very long. You
can scroll through the file using your keyboard’s down arrow or use the
Space key to go forward one page and the b key to
go backwards one page. When you are done reading, hit q to
quit.
Challenge
Use the -l option for the ls command to
display more information for each item in the directory. What is one
piece of additional information this long format gives you that you
don’t see with the bare ls command?
OUTPUT
total 8
drwxr-x--- 2 dcuser dcuser 4096 Jul 30  2015 sra_metadata
drwxr-xr-x 2 dcuser dcuser 4096 Nov 15  2017 untrimmed_fastq
The additional information given includes the name of the owner of the file, when the file was last modified, and whether the current user has permission to read and write to the file.
No one can possibly learn all of these arguments, that’s what the manual page is for. You can (and should) refer to the manual page or other help files as needed.
Let’s go into the untrimmed_fastq directory and see what
is in there.
OUTPUT
SRR097977.fastq SRR098026.fastqThis directory contains two files with .fastq
extensions. FASTQ is a format for storing information about sequencing
reads and their quality. We will be learning more about FASTQ files in a
later lesson.
Shortcut: Tab Completion
Typing out file or directory names can waste a lot of time and it’s easy to make typing mistakes. Instead we can use tab complete as a shortcut. When you start typing out the name of a directory or file, then hit the Tab key, the shell will try to fill in the rest of the directory or file name.
Return to your home directory:
then enter:
The shell will fill in the rest of the directory name for
shell_data.
Now change directories to untrimmed_fastq in
shell_data
Using tab complete can be very helpful. However, it will only autocomplete a file or directory name if you’ve typed enough characters to provide a unique identifier for the file or directory you are trying to access.
For example, if we now try to list the files which names start with
SR by using tab complete:
The shell auto-completes your command to SRR09, because
all file names in the directory begin with this prefix. When you hit
Tab again, the shell will list the possible choices.
OUTPUT
SRR097977.fastq SRR098026.fastqTab completion can also fill in the names of programs, which can be useful if you remember the beginning of a program name.
OUTPUT
pwck pwconv pwd pwdx pwunconvDisplays the name of every program that starts with
pw.
Summary
We now know how to move around our file system using the command line. This gives us an advantage over interacting with the file system through a GUI as it allows us to work on a remote server, carry out the same set of operations on a large number of files quickly, and opens up many opportunities for using bioinformatic software that is only available in command line versions.
In the next few episodes, we’ll be expanding on these skills and seeing how using the command line shell enables us to make our workflow more efficient and reproducible.
Key Points
- The shell gives you the ability to work more efficiently by using keyboard commands rather than a GUI.
- Useful commands for navigating your file system include:
ls,pwd, andcd. - Most commands take options (flags) which begin with a
-. - Tab completion can reduce errors from mistyping and make work more efficient in the shell.
Content from Navigating Files and Directories
Last updated on 2023-05-08 | Edit this page
Overview
Questions
- How can I perform operations on files outside of my working directory?
- What are some navigational shortcuts I can use to make my work more efficient?
Objectives
- Use a single command to navigate multiple steps in your directory structure, including moving backwards (one level up).
- Perform operations on files in directories outside your working directory.
- Work with hidden directories and hidden files.
- Interconvert between absolute and relative paths.
- Employ navigational shortcuts to move around your file system.
Moving around the file system
We’ve learned how to use pwd to find our current
location within our file system. We’ve also learned how to use
cd to change locations and ls to list the
contents of a directory. Now we’re going to learn some additional
commands for moving around within our file system.
Use the commands we’ve learned so far to navigate to the
shell_data/untrimmed_fastq directory, if you’re not already
there.
What if we want to move back up and out of this directory and to our
top level directory? Can we type cd shell_data? Try it and
see what happens.
OUTPUT
-bash: cd: shell_data: No such file or directoryYour computer looked for a directory or file called
shell_data within the directory you were already in. It
didn’t know you wanted to look at a directory level above the one you
were located in.
We have a special command to tell the computer to move us back or up one directory level.
Now we can use pwd to make sure that we are in the
directory we intended to navigate to, and ls to check that
the contents of the directory are correct.
OUTPUT
/home/dcuser/shell_dataOUTPUT
sra_metadata untrimmed_fastqFrom this output, we can see that .. did indeed take us
back one level in our file system.
You can chain these together like so:
prints the contents of /home.
First use the man command to look at the options for
ls.
The -a option is short for all and says
that it causes ls to “not ignore entries starting with .”
This is the option we want.
OUTPUT
. .. .hidden sra_metadata untrimmed_fastqThe name of the hidden directory is .hidden. We can
navigate to that directory using cd.
And then list the contents of the directory using
ls.
OUTPUT
youfoundit.txtThe name of the text file is youfoundit.txt.
In most commands the flags can be combined together in no particular order to obtain the desired results/output.
$ ls -Fa
$ ls -laF
Examining the contents of other directories
By default, the ls commands lists the contents of the
working directory (i.e. the directory you are in). You can always find
the directory you are in using the pwd command. However,
you can also give ls the names of other directories to
view. Navigate to your home directory if you are not already there.
Then enter the command:
OUTPUT
sra_metadata untrimmed_fastqThis will list the contents of the shell_data directory
without you needing to navigate there.
The cd command works in a similar way.
Try entering:
This will take you to the untrimmed_fastq directory
without having to go through the intermediate directory.
Full vs. Relative Paths
The cd command takes an argument which is a directory
name. Directories can be specified using either a relative path
or a full absolute path. The directories on the computer are
arranged into a hierarchy. The full path tells you where a directory is
in that hierarchy. Navigate to the home directory, then enter the
pwd command.
You will see:
OUTPUT
/home/dcuserThis is the full name of your home directory. This tells you that you
are in a directory called dcuser, which sits inside a
directory called home which sits inside the very top
directory in the hierarchy. The very top of the hierarchy is a directory
called / which is usually referred to as the root
directory. So, to summarize: dcuser is a directory in
home which is a directory in /. More on
root and home in the next section.
Now enter the following command:
This jumps forward multiple levels to the .hidden
directory. Now go back to the home directory.
You can also navigate to the .hidden directory
using:
These two commands have the same effect, they both take us to the
.hidden directory. The first uses the absolute path, giving
the full address from the home directory. The second uses a relative
path, giving only the address from the working directory. A full path
always starts with a /. A relative path does not.
A relative path is like getting directions from someone on the street. They tell you to “go right at the stop sign, and then turn left on Main Street”. That works great if you’re standing there together, but not so well if you’re trying to tell someone how to get there from another country. A full path is like GPS coordinates. It tells you exactly where something is no matter where you are right now.
You can usually use either a full path or a relative path depending on what is most convenient. If we are in the home directory, it is more convenient to enter the full path. If we are in the working directory, it is more convenient to enter the relative path since it involves less typing.
Over time, it will become easier for you to keep a mental note of the structure of the directories that you are using and how to quickly navigate amongst them.
Relative path resolution
Using the filesystem diagram below, if pwd displays
/Users/thing, what will ls ../backup
display?
../backup: No such file or directory2012-12-01 2013-01-08 2013-01-272012-12-01/ 2013-01-08/ 2013-01-27/original pnas_final pnas_sub

- No: there is a directory
backupin/Users. - No: this is the content of
Users/thing/backup, but with..we asked for one level further up. - No: see previous explanation. Also, we did not specify
-Fto display/at the end of the directory names. - Yes:
../backuprefers to/Users/backup.
Navigational Shortcuts
The root directory is the highest level directory in your file system
and contains files that are important for your computer to perform its
daily work. While you will be using the root (/) at the
beginning of your absolute paths, it is important that you avoid working
with data in these higher-level directories, as your commands can
permanently alter files that the operating system needs to function. In
many cases, trying to run commands in root directories will
require special permissions which are not discussed here, so it’s best
to avoid them and work within your home directory. Dealing with the
home directory is very common. The tilde character,
~, is a shortcut for your home directory. In our case, the
root directory is two levels above our
home directory, so cd or cd ~
will take you to /home/dcuser and cd / will
take you to /. Navigate to the shell_data
directory:
Then enter the command:
OUTPUT
R r_data shell_dataThis prints the contents of your home directory, without you needing to type the full path.
The commands cd, and cd ~ are very useful
for quickly navigating back to your home directory. We will be using the
~ character in later lessons to specify our home
directory.
Key Points
- The
/,~, and..characters represent important navigational shortcuts. - Hidden files and directories start with
.and can be viewed usingls -a. - Relative paths specify a location starting from the current location, while absolute paths specify a location from the root of the file system.
Content from Working with Files and Directories
Last updated on 2023-05-08 | Edit this page
Overview
Questions
- How can I view and search file contents?
- How can I create, copy and delete files and directories?
- How can I control who has permission to modify a file?
- How can I repeat recently used commands?
Objectives
- View, search within, copy, move, and rename files. Create new directories.
- Use wildcards (
*) to perform operations on multiple files. - Make a file read only.
- Use the
historycommand to view and repeat recently used commands.
Working with Files
Our data set: FASTQ files
Now that we know how to navigate around our directory structure,
let’s start working with our sequencing files. We did a sequencing
experiment and have two results files, which are stored in our
untrimmed_fastq directory.
Wildcards
Navigate to your untrimmed_fastq directory:
We are interested in looking at the FASTQ files in this directory. We can list all files with the .fastq extension using the command:
OUTPUT
SRR097977.fastq SRR098026.fastqThe * character is a special type of character called a
wildcard, which can be used to represent any number of any type of
character. Thus, *.fastq matches every file that ends with
.fastq.
This command:
OUTPUT
SRR097977.fastqlists only the file that ends with 977.fastq.
This command:
OUTPUT
/usr/bin/amuFormat.sh /usr/bin/gettext.sh /usr/bin/gvmap.shLists every file in /usr/bin that ends in the characters
.sh. Note that the output displays full
paths to files, since each result starts with /.
Exercise
Do each of the following tasks from your current directory using a
single ls command for each:
- List all of the files in
/usr/binthat start with the letter ‘c’. - List all of the files in
/usr/binthat contain the letter ‘a’. - List all of the files in
/usr/binthat end with the letter ‘o’.
Bonus: List all of the files in /usr/bin that contain
the letter ‘a’ or the letter ‘c’.
Hint: The bonus question requires a Unix wildcard that we haven’t talked about yet. Try searching the internet for information about Unix wildcards to find what you need to solve the bonus problem.
ls /usr/bin/c*ls /usr/bin/*a*-
ls /usr/bin/*o
Bonus:ls /usr/bin/*[ac]*
Exercise
echo is a built-in shell command that writes its
arguments, like a line of text to standard output. The echo
command can also be used with pattern matching characters, such as
wildcard characters. Here we will use the echo command to
see how the wildcard character is interpreted by the shell.
OUTPUT
SRR097977.fastq SRR098026.fastqThe * is expanded to include any file that ends with
.fastq. We can see that the output of
echo *.fastq is the same as that of
ls *.fastq.
What would the output look like if the wildcard could not be
matched? Compare the outputs of echo *.missing and
ls *.missing.
Command History
If you want to repeat a command that you’ve run recently, you can access previous commands using the up arrow on your keyboard to go back to the most recent command. Likewise, the down arrow takes you forward in the command history.
A few more useful shortcuts:
- Ctrl+C will cancel the command you are writing, and give you a fresh prompt.
- Ctrl+R will do a reverse-search through your command history. This is very useful.
-
Ctrl+L or the
clearcommand will clear your screen.
You can also review your recent commands with the
history command, by entering:
to see a numbered list of recent commands. You can reuse one of these commands directly by referring to the number of that command.
For example, if your history looked like this:
OUTPUT
259  ls *
260  ls /usr/bin/*.sh
261  ls *R1*fastq
then you could repeat command #260 by entering:
Type ! (exclamation point) and then the number of the
command from your history. You will be glad you learned this when you
need to re-run very complicated commands. For more information on
advanced usage of history, read section 9.3 of Bash
manual.
Exercise
Find the line number in your history for the command that listed all
the .sh files in /usr/bin. Rerun that command.
First type history. Then use ! followed by
the line number to rerun that command.
Examining Files
We now know how to switch directories, run programs, and look at the contents of directories, but how do we look at the contents of files?
One way to examine a file is to print out all of the contents using
the program cat.
Enter the following command from within the
untrimmed_fastq directory:
This will print out all of the contents of the
SRR098026.fastq to the screen.
Exercise
- Print out the contents of the
~/shell_data/untrimmed_fastq/SRR097977.fastqfile. What is the last line of the file? - From your home directory, and without changing directories, use one
short command to print the contents of all of the files in the
~/shell_data/untrimmed_fastqdirectory.
- The last line of the file is
C:CCC::CCCCCCCC<8?6A:C28C<608'&&&,'$. cat ~/shell_data/untrimmed_fastq/*
cat is a terrific program, but when the file is really
big, it can be annoying to use. The program, less, is
useful for this case. less opens the file as read only, and
lets you navigate through it. The navigation commands are identical to
the man program.
Enter the following command:
Some navigation commands in less:
| key | action |
|---|---|
| Space | to go forward |
| b | to go backward |
| g | to go to the beginning |
| G | to go to the end |
| q | to quit |
less also gives you a way of searching through files.
Use the “/” key to begin a search. Enter the word you would like to
search for and press enter. The screen will jump to the
next location where that word is found.
Shortcut: If you hit “/” then “enter”,
less will repeat the previous search. less
searches from the current location and works its way forward. Scroll up
a couple lines on your terminal to verify you are at the beginning of
the file. Note, if you are at the end of the file and search for the
sequence “CAA”, less will not find it. You either need to
go to the beginning of the file (by typing g) and search
again using / or you can use ? to search
backwards in the same way you used / previously.
For instance, let’s search forward for the sequence
TTTTT in our file. You can see that we go right to that
sequence, what it looks like, and where it is in the file. If you
continue to type / and hit return, you will move forward to
the next instance of this sequence motif. If you instead type
? and hit return, you will search backwards and move up the
file to previous examples of this motif.
Exercise
What are the next three nucleotides (characters) after the first instance of the sequence quoted above?
CAC
Remember, the man program actually uses
less internally and therefore uses the same commands, so
you can search documentation using “/” as well!
There’s another way that we can look at files, and in this case, just look at part of them. This can be particularly useful if we just want to see the beginning or end of the file, or see how it’s formatted.
The commands are head and tail and they let
you look at the beginning and end of a file, respectively.
OUTPUT
@SRR098026.1 HWUSI-EAS1599_1:2:1:0:968 length=35
NNNNNNNNNNNNNNNNCNNNNNNNNNNNNNNNNNN
+SRR098026.1 HWUSI-EAS1599_1:2:1:0:968 length=35
!!!!!!!!!!!!!!!!#!!!!!!!!!!!!!!!!!!
@SRR098026.2 HWUSI-EAS1599_1:2:1:0:312 length=35
NNNNNNNNNNNNNNNNANNNNNNNNNNNNNNNNNN
+SRR098026.2 HWUSI-EAS1599_1:2:1:0:312 length=35
!!!!!!!!!!!!!!!!#!!!!!!!!!!!!!!!!!!
@SRR098026.3 HWUSI-EAS1599_1:2:1:0:570 length=35
NNNNNNNNNNNNNNNNANNNNNNNNNNNNNNNNNNOUTPUT
+SRR098026.247 HWUSI-EAS1599_1:2:1:2:1311 length=35
#!##!#################!!!!!!!######
@SRR098026.248 HWUSI-EAS1599_1:2:1:2:118 length=35
GNTGNGGTCATCATACGCGCCCNNNNNNNGGCATG
+SRR098026.248 HWUSI-EAS1599_1:2:1:2:118 length=35
B!;?!A=5922:##########!!!!!!!######
@SRR098026.249 HWUSI-EAS1599_1:2:1:2:1057 length=35
CNCTNTATGCGTACGGCAGTGANNNNNNNGGAGAT
+SRR098026.249 HWUSI-EAS1599_1:2:1:2:1057 length=35
A!@B!BBB@ABAB#########!!!!!!!######
The -n option to either of these commands can be used to
print the first or last n lines of a file.
OUTPUT
@SRR098026.1 HWUSI-EAS1599_1:2:1:0:968 length=35OUTPUT
A!@B!BBB@ABAB#########!!!!!!!######Details on the FASTQ format
Although it looks complicated (and it is), it’s easy to understand the fastq format with a little decoding. Some rules about the format include…
| Line | Description |
|---|---|
| 1 | Always begins with ‘@’ and then information about the read |
| 2 | The actual DNA sequence |
| 3 | Always begins with a ‘+’ and sometimes the same info in line 1 |
| 4 | Has a string of characters which represent the quality scores; must have same number of characters as line 2 |
We can view the first complete read in one of the files in our
dataset by using head to look at the first four lines.
OUTPUT
@SRR098026.1 HWUSI-EAS1599_1:2:1:0:968 length=35
NNNNNNNNNNNNNNNNCNNNNNNNNNNNNNNNNNN
+SRR098026.1 HWUSI-EAS1599_1:2:1:0:968 length=35
!!!!!!!!!!!!!!!!#!!!!!!!!!!!!!!!!!!
All but one of the nucleotides in this read are unknown
(N). This is a pretty bad read!
Line 4 shows the quality for each nucleotide in the read. Quality is interpreted as the probability of an incorrect base call (e.g. 1 in 10) or, equivalently, the base call accuracy (e.g. 90%). To make it possible to line up each individual nucleotide with its quality score, the numerical score is converted into a code where each individual character represents the numerical quality score for an individual nucleotide. For example, in the line above, the quality score line is:
OUTPUT
!!!!!!!!!!!!!!!!#!!!!!!!!!!!!!!!!!!The # character and each of the !
characters represent the encoded quality for an individual nucleotide.
The numerical value assigned to each of these characters depends on the
sequencing platform that generated the reads. The sequencing machine
used to generate our data uses the standard Sanger quality PHRED score
encoding, Illumina version 1.8 onwards. Each character is assigned a
quality score between 0 and 42 as shown in the chart below.
OUTPUT
Quality encoding: !"#$%&'()*+,-./0123456789:;<=>?@ABCDEFGHIJK
                  |         |         |         |         |
Quality score:    0........10........20........30........40..
Each quality score represents the probability that the corresponding nucleotide call is incorrect. This quality score is logarithmically based, so a quality score of 10 reflects a base call accuracy of 90%, but a quality score of 20 reflects a base call accuracy of 99%. These probability values are the results from the base calling algorithm and dependent on how much signal was captured for the base incorporation.
Looking back at our read:
OUTPUT
@SRR098026.1 HWUSI-EAS1599_1:2:1:0:968 length=35
NNNNNNNNNNNNNNNNCNNNNNNNNNNNNNNNNNN
+SRR098026.1 HWUSI-EAS1599_1:2:1:0:968 length=35
!!!!!!!!!!!!!!!!#!!!!!!!!!!!!!!!!!!
we can now see that the quality of each of the Ns is 0
and the quality of the only nucleotide call (C) is also
very poor (# = a quality score of 2). This is indeed a very
bad read.
Creating, moving, copying, and removing
Now we can move around in the file structure, look at files, and search files. But what if we want to copy files or move them around or get rid of them? Most of the time, you can do these sorts of file manipulations without the command line, but there will be some cases (like when you’re working with a remote computer like we are for this lesson) where it will be impossible. You’ll also find that you may be working with hundreds of files and want to do similar manipulations to all of those files. In cases like this, it’s much faster to do these operations at the command line.
Copying Files
When working with computational data, it’s important to keep a safe copy of that data that can’t be accidentally overwritten or deleted. For this lesson, our raw data is our FASTQ files. We don’t want to accidentally change the original files, so we’ll make a copy of them and change the file permissions so that we can read from, but not write to, the files.
First, let’s make a copy of one of our FASTQ files using the
cp command.
Navigate to the shell_data/untrimmed_fastq directory and
enter:
OUTPUT
SRR097977.fastq SRR098026-copy.fastq SRR098026.fastqWe now have two copies of the SRR098026.fastq file, one
of them named SRR098026-copy.fastq. We’ll move this file to
a new directory called backup where we’ll store our backup
data files.
Creating Directories
The mkdir command is used to make a directory. Enter
mkdir followed by a space, then the directory name you want
to create:
Moving / Renaming
We can now move our backup file to this directory. We can move files
around using the command mv:
OUTPUT
SRR098026-copy.fastqThe mv command is also how you rename files. Let’s
rename this file to make it clear that this is a backup:
OUTPUT
SRR098026-backup.fastqFile Permissions
We’ve now made a backup copy of our file, but just because we have two copies, it doesn’t make us safe. We can still accidentally delete or overwrite both copies. To make sure we can’t accidentally mess up this backup file, we’re going to change the permissions on the file so that we’re only allowed to read (i.e. view) the file, not write to it (i.e. make new changes).
View the current permissions on a file using the -l
(long) flag for the ls command:
OUTPUT
-rw-r--r-- 1 dcuser dcuser 43332 Nov 15 23:02 SRR098026-backup.fastqThe first part of the output for the -l flag gives you
information about the file’s current permissions. There are ten slots in
the permissions list. The first character in this list is related to
file type, not permissions, so we’ll ignore it for now. The next three
characters relate to the permissions that the file owner has, the next
three relate to the permissions for group members, and the final three
characters specify what other users outside of your group can do with
the file. We’re going to concentrate on the three positions that deal
with your permissions (as the file owner).

Here the three positions that relate to the file owner are
rw-. The r means that you have permission to
read the file, the w indicates that you have permission to
write to (i.e. make changes to) the file, and the third position is a
-, indicating that you don’t have permission to carry out
the ability encoded by that space (this is the space where
x or executable ability is stored, we’ll talk more about
this in a later lesson).
Our goal for now is to change permissions on this file so that you no
longer have w or write permissions. We can do this using
the chmod (change mode) command and subtracting
(-) the write permission -w.
OUTPUT
-r--r--r-- 1 dcuser dcuser 43332 Nov 15 23:02 SRR098026-backup.fastqRemoving
To prove to ourselves that you no longer have the ability to modify
this file, try deleting it with the rm command:
You’ll be asked if you want to override your file permissions:
OUTPUT
rm: remove write-protected regular file ‘SRR098026-backup.fastq'? You should enter n for no. If you enter n
(for no), the file will not be deleted. If you enter y, you
will delete the file. This gives us an extra measure of security, as
there is one more step between us and deleting our data files.
Important: The rm command permanently
removes the file. Be careful with this command. It doesn’t just nicely
put the files in the Trash. They’re really gone.
By default, rm will not delete directories. You can tell
rm to delete a directory using the -r
(recursive) option. Let’s delete the backup directory we just made.
Enter the following command:
This will delete not only the directory, but all files within the directory. If you have write-protected files in the directory, you will be asked whether you want to override your permission settings.
Exercise
Starting in the shell_data/untrimmed_fastq/ directory,
do the following:
- Make sure that you have deleted your backup directory and all files it contains.
- Create a backup of each of your FASTQ files using
cp. (Note: You’ll need to do this individually for each of the two FASTQ files. We haven’t learned yet how to do this with a wildcard.) - Use a wildcard to move all of your backup files to a new backup directory.
- Change the permissions on all of your backup files to be write-protected.
rm -r backup-
cp SRR098026.fastq SRR098026-backup.fastqandcp SRR097977.fastq SRR097977-backup.fastq -
mkdir backupandmv *-backup.fastq backup -
chmod -w backup/*-backup.fastq
It’s always a good idea to check your work withls -l backup. You should see something like:
OUTPUT
-r--r--r-- 1 dcuser dcuser 47552 Nov 15 23:06 SRR097977-backup.fastq
-r--r--r-- 1 dcuser dcuser 43332 Nov 15 23:06 SRR098026-backup.fastq
Key Points
- You can view file contents using
less,cat,headortail. - The commands
cp,mv, andmkdirare useful for manipulating existing files and creating new directories. - You can view file permissions using
ls -land change permissions usingchmod. - The
historycommand and the up arrow on your keyboard can be used to repeat recently used commands.
Content from Redirection
Last updated on 2024-03-14 | Edit this page
Overview
Questions
- How can I search within files?
- How can I combine existing commands to do new things?
Objectives
- Employ the
grepcommand to search for information within files. - Print the results of a command to a file.
- Construct command pipelines with two or more stages.
- Use
forloops to run the same command for several input files.
Searching files
We discussed in a previous episode how to search within a file using
less. We can also search within files without even opening
them, using grep. grep is a command-line
utility for searching plain-text files for lines matching a specific set
of characters (sometimes called a string) or a particular pattern (which
can be specified using something called regular expressions). We’re not
going to work with regular expressions in this lesson, and are instead
going to specify the strings we are searching for. Let’s give it a
try!
Nucleotide abbreviations
The four nucleotides that appear in DNA are abbreviated
A, C, T and G.
Unknown nucleotides are represented with the letter N. An
N appearing in a sequencing file represents a position
where the sequencing machine was not able to confidently determine the
nucleotide in that position. You can think of an N as being
aNy nucleotide at that position in the DNA sequence.
We’ll search for strings inside of our fastq files. Let’s first make sure we are in the correct directory:
Suppose we want to see how many reads in our file have really bad segments containing 10 consecutive unknown nucleotides (Ns).
Determining quality
In this lesson, we’re going to be manually searching for strings of
Ns within our sequence results to illustrate some
principles of file searching. It can be really useful to do this type of
searching to get a feel for the quality of your sequencing results,
however, in your research you will most likely use a bioinformatics tool
that has a built-in program for filtering out low-quality reads. You’ll
learn how to use one such tool in a
later lesson.
Let’s search for the string NNNNNNNNNN in the SRR098026 file:
This command returns a lot of output to the terminal. Every single line in the SRR098026 file that contains at least 10 consecutive Ns is printed to the terminal, regardless of how long or short the file is. We may be interested not only in the actual sequence which contains this string, but in the name (or identifier) of that sequence. We discussed in a previous lesson that the identifier line immediately precedes the nucleotide sequence for each read in a FASTQ file. We may also want to inspect the quality scores associated with each of these reads. To get all of this information, we will return the line immediately before each match and the two lines immediately after each match.
We can use the -B argument for grep to return a specific
number of lines before each match. The -A argument returns
a specific number of lines after each matching line. Here we want the
line before and the two lines after each matching
line, so we add -B1 -A2 to our grep command:
One of the sets of lines returned by this command is:
OUTPUT
@SRR098026.177 HWUSI-EAS1599_1:2:1:1:2025 length=35
CNNNNNNNNNNNNNNNNNNNNNNNNNNNNNNNNNN
+SRR098026.177 HWUSI-EAS1599_1:2:1:1:2025 length=35
#!!!!!!!!!!!!!!!!!!!!!!!!!!!!!!!!!!
Exercise
Search for the sequence
GNATNACCACTTCCin theSRR098026.fastqfile. Have your search return all matching lines and the name (or identifier) for each sequence that contains a match.Search for the sequence
AAGTTin both FASTQ files. Have your search return all matching lines and the name (or identifier) for each sequence that contains a match.
grep -B1 GNATNACCACTTCC SRR098026.fastq
@SRR098026.245 HWUSI-EAS1599_1:2:1:2:801 length=35
GNATNACCACTTCCAGTGCTGANNNNNNNGGGATG
grep -B1 AAGTT *.fastq
SRR097977.fastq-@SRR097977.11 209DTAAXX_Lenski2_1_7:8:3:247:351 length=36
SRR097977.fastq:GATTGCTTTAATGAAAAAGTCATATAAGTTGCCATG
--
SRR097977.fastq-@SRR097977.67 209DTAAXX_Lenski2_1_7:8:3:544:566 length=36
SRR097977.fastq:TTGTCCACGCTTTTCTATGTAAAGTTTATTTGCTTT
--
SRR097977.fastq-@SRR097977.68 209DTAAXX_Lenski2_1_7:8:3:724:110 length=36
SRR097977.fastq:TGAAGCCTGCTTTTTTATACTAAGTTTGCATTATAA
--
SRR097977.fastq-@SRR097977.80 209DTAAXX_Lenski2_1_7:8:3:258:281 length=36
SRR097977.fastq:GTGGCGCTGCTGCATAAGTTGGGTTATCAGGTCGTT
--
SRR097977.fastq-@SRR097977.92 209DTAAXX_Lenski2_1_7:8:3:353:318 length=36
SRR097977.fastq:GGCAAAATGGTCCTCCAGCCAGGCCAGAAGCAAGTT
--
SRR097977.fastq-@SRR097977.139 209DTAAXX_Lenski2_1_7:8:3:703:655 length=36
SRR097977.fastq:TTTATTTGTAAAGTTTTGTTGAAATAAGGGTTGTAA
--
SRR097977.fastq-@SRR097977.238 209DTAAXX_Lenski2_1_7:8:3:592:919 length=36
SRR097977.fastq:TTCTTACCATCCTGAAGTTTTTTCATCTTCCCTGAT
--
SRR098026.fastq-@SRR098026.158 HWUSI-EAS1599_1:2:1:1:1505 length=35
SRR098026.fastq:GNNNNNNNNCAAAGTTGATCNNNNNNNNNTGTGCG
Redirecting output
grep allowed us to identify sequences in our FASTQ files
that match a particular pattern. All of these sequences were printed to
our terminal screen, but in order to work with these sequences and
perform other operations on them, we will need to capture that output in
some way.
We can do this with something called “redirection”. The idea is that we are taking what would ordinarily be printed to the terminal screen and redirecting it to another location. In our case, we want to print this information to a file so that we can look at it later and use other commands to analyze this data.
The command for redirecting output to a file is
>.
Let’s try out this command and copy all the records (including all
four lines of each record) in our FASTQ files that contain ‘NNNNNNNNNN’
to another file called bad_reads.txt.
File extensions
You might be confused about why we’re naming our output file with a
.txt extension. After all, it will be holding FASTQ
formatted data that we’re extracting from our FASTQ files. Won’t it also
be a FASTQ file? The answer is, yes - it will be a FASTQ file and it
would make sense to name it with a .fastq extension.
However, using a .fastq extension will lead us to problems
when we move to using wildcards later in this episode. We’ll point out
where this becomes important. For now, it’s good that you’re thinking
about file extensions!
The prompt should sit there a little bit, and then it should look
like nothing happened. But type ls. You should see a new
file called bad_reads.txt.
We can check the number of lines in our new file using a command
called wc. wc stands for word
count. This command counts the number of words, lines, and
characters in a file. The FASTQ file may change over time, so given the
potential for updates, make sure your file matches your instructor’s
output.
As of Sept. 2020, wc gives the following output:
OUTPUT
802 1338 24012 bad_reads.txtThis will tell us the number of lines, words and characters in the
file. If we want only the number of lines, we can use the
-l flag for lines.
OUTPUT
802 bad_reads.txtExercise
How many sequences are there in SRR098026.fastq?
Remember that every sequence is formed by four lines.
OUTPUT
996Now you can divide this number by four to get the number of sequences in your fastq file.
This can be done using shell integer arithmetic
Note, this will do integer division - if you need floating point arithmetic you can use bc - an arbitrary precision calculator
OUTPUT
249Exercise
How many sequences in SRR098026.fastq contain at least 3
consecutive Ns?
We might want to search multiple FASTQ files for sequences that match
our search pattern. However, we need to be careful, because each time we
use the > command to redirect output to a file, the new
output will replace the output that was already present in the file.
This is called “overwriting” and, just like you don’t want to overwrite
your video recording of your kid’s first birthday party, you also want
to avoid overwriting your data files.
OUTPUT
802 bad_reads.txtOUTPUT
0 bad_reads.txtHere, the output of our second call to wc shows that we
no longer have any lines in our bad_reads.txt file. This is
because the second file we searched (SRR097977.fastq) does
not contain any lines that match our search sequence. So our file was
overwritten and is now empty.
We can avoid overwriting our files by using the command
>>. >> is known as the “append
redirect” and will append new output to the end of a file, rather than
overwriting it.
OUTPUT
802 bad_reads.txtOUTPUT
802 bad_reads.txtThe output of our second call to wc shows that we have
not overwritten our original data.
We can also do this with a single line of code by using a wildcard:
OUTPUT
802 bad_reads.txtFile extensions - part 2
This is where we would have trouble if we were naming our output file
with a .fastq extension. If we already had a file called
bad_reads.fastq (from our previous grep
practice) and then ran the command above using a .fastq
extension instead of a .txt extension, grep
would give us a warning.
OUTPUT
grep: input file ‘bad_reads.fastq' is also the outputgrep is letting you know that the output file
bad_reads.fastq is also included in your grep
call because it matches the *.fastq pattern. Be careful
with this as it can lead to some unintended results.
Since we might have multiple different criteria we want to search
for, creating a new output file each time has the potential to clutter
up our workspace. We also thus far haven’t been interested in the actual
contents of those files, only in the number of reads that we’ve found.
We created the files to store the reads and then counted the lines in
the file to see how many reads matched our criteria. There’s a way to do
this, however, that doesn’t require us to create these intermediate
files - the pipe command (|).
This is probably not a key on your keyboard you use very much, so
let’s all take a minute to find that key. In the UK and US keyboard
layouts, and several others, the | character can be found
using the key combination Shift+</kbd>. This may
be different for other language-specific layouts.
What | does is take the output that is scrolling by on
the terminal and uses that output as input to another command. When our
output was scrolling by, we might have wished we could slow it down and
look at it, like we can with less. Well it turns out that
we can! We can redirect our output from our grep call
through the less command.
We can now see the output from our grep call within the
less interface. We can use the up and down arrows to scroll
through the output and use q to exit less.
If we don’t want to create a file before counting lines of output
from our grep search, we could directly pipe the output of
the grep search to the command wc -l. This can be helpful
for investigating your output if you are not sure you would like to save
it to a file.
Because we asked grep for all four lines of each FASTQ
record, we need to divide the output by four to get the number of
sequences that match our search pattern. Since 802 / 4 = 200.5 and we
are expecting an integer number of records, there is something added or
missing in bad_reads.txt. If we explore
bad_reads.txt using less, we might be able to
notice what is causing the uneven number of lines. Luckily, this issue
happens by the end of the file so we can also spot it with
tail.
OUTPUT
@SRR098026.133 HWUSI-EAS1599_1:2:1:0:1978 length=35
ANNNNNNNNNTTCAGCGACTNNNNNNNNNNGTNGN
+SRR098026.133 HWUSI-EAS1599_1:2:1:0:1978 length=35
#!!!!!!!!!##########!!!!!!!!!!##!#!
--
--
@SRR098026.177 HWUSI-EAS1599_1:2:1:1:2025 length=35
CNNNNNNNNNNNNNNNNNNNNNNNNNNNNNNNNNN
+SRR098026.177 HWUSI-EAS1599_1:2:1:1:2025 length=35
#!!!!!!!!!!!!!!!!!!!!!!!!!!!!!!!!!!
The fifth and six lines in the output display “–” which is the
default action for grep to separate groups of lines
matching the pattern, and indicate groups of lines which did not match
the pattern so are not displayed. To fix this issue, we can redirect the
output of grep to a second instance of grep as follows.
BASH
$ grep -B1 -A2 NNNNNNNNNN SRR098026.fastq | grep -v '^--' > bad_reads.fastq
$ tail bad_reads.fastq
OUTPUT
+SRR098026.132 HWUSI-EAS1599_1:2:1:0:320 length=35
#!!!!!!!!!##########!!!!!!!!!!##!#!
@SRR098026.133 HWUSI-EAS1599_1:2:1:0:1978 length=35
ANNNNNNNNNTTCAGCGACTNNNNNNNNNNGTNGN
+SRR098026.133 HWUSI-EAS1599_1:2:1:0:1978 length=35
#!!!!!!!!!##########!!!!!!!!!!##!#!
@SRR098026.177 HWUSI-EAS1599_1:2:1:1:2025 length=35
CNNNNNNNNNNNNNNNNNNNNNNNNNNNNNNNNNN
+SRR098026.177 HWUSI-EAS1599_1:2:1:1:2025 length=35
#!!!!!!!!!!!!!!!!!!!!!!!!!!!!!!!!!!
The -v option in the second grep search
stands for --invert-match meaning grep will
now only display the lines which do not match the searched pattern, in
this case '^--'. The caret (^) is an
anchoring character matching the beginning of the line,
and the pattern has to be enclose by single quotes so grep
does not interpret the pattern as an extended option (starting with
–).
Custom grep control
Use man grep to read more about other options to
customize the output of grep including extended options,
anchoring characters, and much more.
Redirecting output is often not intuitive, and can take some time to get used to. Once you’re comfortable with redirection, however, you’ll be able to combine any number of commands to do all sorts of exciting things with your data!
None of the command line programs we’ve been learning do anything all that impressive on their own, but when you start chaining them together, you can do some really powerful things very efficiently.
File manipulation and more practices with pipes
To practice a bit more with the tools we’ve added to our tool kit so far and learn a few extra ones you can follow this extra lesson which uses the SRA metadata file.
Writing for loops
Loops are key to productivity improvements through automation as they allow us to execute commands repeatedly. Similar to wildcards and tab completion, using loops also reduces the amount of typing (and typing mistakes). Loops are helpful when performing operations on groups of sequencing files, such as unzipping or trimming multiple files. We will use loops for these purposes in subsequent analyses, but will cover the basics of them for now.
When the shell sees the keyword for, it knows to repeat
a command (or group of commands) once for each item in a list. Each time
the loop runs (called an iteration), an item in the list is assigned in
sequence to the variable, and the commands inside the
loop are executed, before moving on to the next item in the list. Inside
the loop, we call for the variable’s value by putting $ in
front of it. The $ tells the shell interpreter to treat the
variable as a variable name and substitute its value in
its place, rather than treat it as text or an external command. In shell
programming, this is usually called “expanding” the variable.
Sometimes, we want to expand a variable without any whitespace to its
right. Suppose we have a variable named foo that contains
the text abc, and would like to expand foo to
create the text abcEFG.
The interpreter is trying to expand a variable named
fooEFG, which (probably) doesn’t exist. We can avoid this
problem by enclosing the variable name in braces ({ and
}, also called “curly brackets”). bash treats
the # character as a comment character. Any text on a line
after a # is ignored by bash when evaluating the text as
code.
Let’s write a for loop to show us the first two lines of the fastq
files we downloaded earlier. You will notice the shell prompt changes
from $ to > and back again as we were
typing in our loop. The second prompt, >, is different
to remind us that we haven’t finished typing a complete command yet. A
semicolon, ;, can be used to separate two commands written
on a single line.
The for loop begins with the formula
for <variable> in <group to iterate over>. In
this case, the word filename is designated as the variable
to be used over each iteration. In our case SRR097977.fastq
and SRR098026.fastq will be substituted for
filename because they fit the pattern of ending with .fastq
in the directory we’ve specified. The next line of the for loop is
do. The next line is the code that we want to execute. We
are telling the loop to print the first two lines of each variable we
iterate over. Finally, the word done ends the loop.
After executing the loop, you should see the first two lines of both fastq files printed to the terminal. Let’s create a loop that will save this information to a file.
When writing a loop, you will not be able to return to previous lines once you have pressed Enter. Remember that we can cancel the current command using
- Ctrl+C
If you notice a mistake that is going to prevent your loop for executing correctly.
Note that we are using >> to append the text to
our seq_info.txt file. If we used >, the
seq_info.txt file would be rewritten every time the loop
iterates, so it would only have text from the last variable used.
Instead, >> adds to the end of the file.
Using Basename in for loops
Basename is a function in UNIX that is helpful for removing a uniform
part of a name from a list of files. In this case, we will use basename
to remove the .fastq extension from the files that we’ve
been working with.
We see that this returns just the SRR accession, and no longer has the .fastq file extension on it.
OUTPUT
SRR097977If we try the same thing but use .fasta as the file
extension instead, nothing happens. This is because basename only works
when it exactly matches a string in the file.
OUTPUT
SRR097977.fastqBasename is really powerful when used in a for loop. It allows to access just the file prefix, which you can use to name things. Let’s try this.
Inside our for loop, we create a new name variable. We call the
basename function inside the parenthesis, then give our variable name
from the for loop, in this case ${filename}, and finally
state that .fastq should be removed from the file name.
It’s important to note that we’re not changing the actual files, we’re
creating a new variable called name. The line > echo $name will print
to the terminal the variable name each time the for loop runs. Because
we are iterating over two files, we expect to see two lines of
output.
Exercise
Print the file prefix of all of the .txt files in our
current directory.
One way this is really useful is to move files. Let’s rename all of
our .txt files using mv so that they have the years on
them, which will document when we created them.
BASH
$ for filename in *.txt
> do
> name=$(basename ${filename} .txt)
> mv ${filename}  ${name}_2019.txt
> done
Exercise
Remove _2019 from all of the .txt
files.
Key Points
-
grepis a powerful search tool with many options for customization. -
>,>>, and|are different ways of redirecting output. -
command > fileredirects a command’s output to a file. -
command >> fileredirects a command’s output to a file without overwriting the existing contents of the file. -
command_1 | command_2redirects the output of the first command as input to the second command. -
forloops are used for iteration. -
basenamegets rid of repetitive parts of names.
Content from Writing Scripts and Working with Data
Last updated on 2024-04-17 | Edit this page
Overview
Questions
- How can we automate a commonly used set of commands?
Objectives
- Use the
nanotext editor to modify text files. - Write a basic shell script.
- Use the
bashcommand to execute a shell script. - Use
chmodto make a script an executable program.
Writing files
We’ve been able to do a lot of work with files that already exist, but what if we want to write our own files? We’re not going to type in a FASTA file, but we’ll see as we go through other tutorials, there are a lot of reasons we’ll want to write a file, or edit an existing file.
To add text to files, we’re going to use a text editor called Nano.
We’re going to create a file to take notes about what we’ve been doing
with the data files in ~/shell_data/untrimmed_fastq.
This is good practice when working in bioinformatics. We can create a
file called README.txt that describes the data files in the
directory or documents how the files in that directory were generated.
As the name suggests, it’s a file that we or others should read to
understand the information in that directory.
Let’s change our working directory to
~/shell_data/untrimmed_fastq using cd, then
run nano to create a file called
README.txt:
You should see something like this:
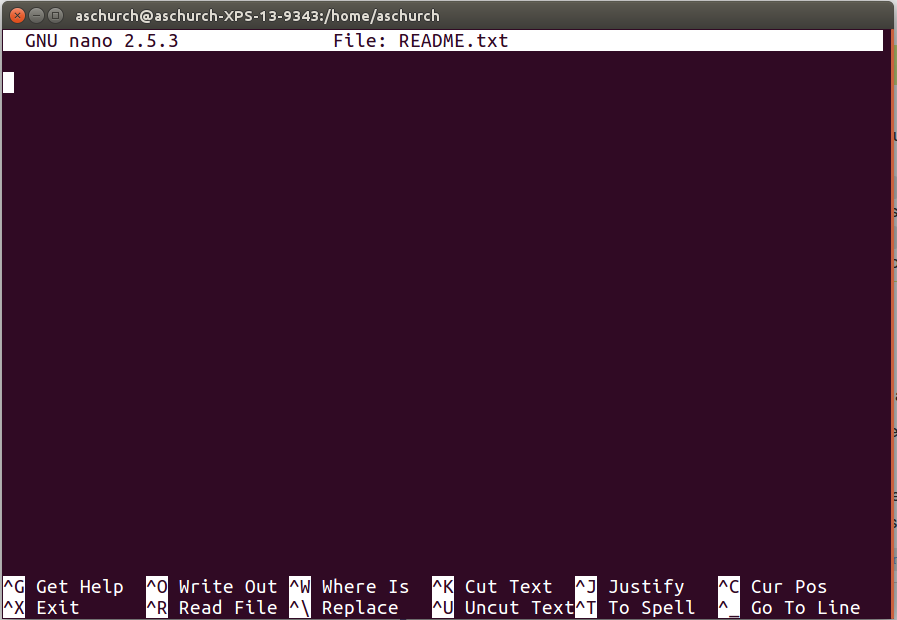
The text at the bottom of the screen shows the keyboard shortcuts for
performing various tasks in nano. We will talk more about
how to interpret this information soon.
Which Editor?
When we say, “nano is a text editor,” we really do mean
“text”: nano can only work with plain character data, not
tables, images, or any other human-friendly media. We use
nano in examples because it is one of the least complex
text editors. However, because of this trait, nano may not
be powerful enough or flexible enough for the work you need to do after
this workshop. On Unix systems (such as Linux and Mac OS X), many
programmers use Emacs
or Vim (both of which require more
time to learn), or a graphical editor such as Gedit. On Windows, you may
wish to use Notepad++.
Windows also has a built-in editor called notepad that can
be run from the command line in the same way as nano for
the purposes of this lesson.
No matter what editor you use, you will need to know the default location where it searches for files and where files are saved. If you start an editor from the shell, it will (probably) use your current working directory as its default location. If you use your computer’s start menu, the editor may want to save files in your desktop or documents directory instead. You can change this by navigating to another directory the first time you “Save As…”
Let’s type in a few lines of text. Describe what the files in this
directory are or what you’ve been doing with them. Once we’re happy with
our text, we can press Ctrl-O (press the
Ctrl or Control key and, while holding it down,
press the O key) to write our data to disk. You’ll be asked
what file we want to save this to: press Return to accept the
suggested default of README.txt.
Once our file is saved, we can use Ctrl-X to
quit the nano editor and return to the shell.
Control, Ctrl, or ^ Key
The Control key is also called the “Ctrl” key. There are various ways in which using the Control key may be described. For example, you may see an instruction to press the Ctrl key and, while holding it down, press the X key, described as any of:
Control-XControl+XCtrl-XCtrl+X^XC-x
In nano, along the bottom of the screen you’ll see
^G Get Help ^O WriteOut. This means that you can use
Ctrl-G to get help and
Ctrl-O to save your file.
Now you’ve written a file. You can take a look at it with
less or cat, or open it up again and edit it
with nano.
Exercise
Open README.txt and add the date to the top of the file
and save the file.
Use nano README.txt to open the file.
Add today’s date and then use Ctrl-X followed by
y and Enter to save.
Writing scripts
A really powerful thing about the command line is that you can write scripts. Scripts let you save commands to run them and also lets you put multiple commands together. Though writing scripts may require an additional time investment initially, this can save you time as you run them repeatedly. Scripts can also address the challenge of reproducibility: if you need to repeat an analysis, you retain a record of your command history within the script.
One thing we will commonly want to do with sequencing results is pull out bad reads and write them to a file to see if we can figure out what’s going on with them. We’re going to look for reads with long sequences of N’s like we did before, but now we’re going to write a script, so we can run it each time we get new sequences, rather than type the code in by hand each time.
We’re going to create a new file to put this command in. We’ll call
it bad-reads-script.sh. The sh isn’t required,
but using that extension tells us that it’s a shell script.
Bad reads have a lot of N’s, so we’re going to look for
NNNNNNNNNN with grep. We want the whole FASTQ
record, so we’re also going to get the one line above the sequence and
the two lines below. We also want to look in all the files that end with
.fastq, so we’re going to use the *
wildcard.
Custom grep control
We introduced the -v option in the previous episode, now we are using
-h to “Suppress the prefixing of file names on output”
according to the documentation shown by man grep.
Type your grep command into the file and save it as
before. Be careful that you did not add the $ at the
beginning of the line.
Now comes the neat part. We can run this script. Type:
It will look like nothing happened, but now if you look at
scripted_bad_reads.txt, you can see that there are now
reads in the file.
Exercise
We want the script to tell us when it’s done.
- Open
bad-reads-script.shand add the lineecho "Script finished!"after thegrepcommand and save the file. - Run the updated script.
$ bash bad-reads-script.sh
Script finished!
Making the script into a program
We had to type bash because we needed to tell the
computer what program to use to run this script. Instead, we can turn
this script into its own program. We need to tell the computer that this
script is a program by making the script file executable. We can do this
by changing the file permissions. We talked about permissions in an earlier episode.
First, let’s look at the current permissions.
OUTPUT
-rw-r--r-- 1 dcuser dcuser 0 Oct 25 21:46 bad-reads-script.shWe see that it says -rw-r--r--. This shows that the file
can be read by any user and written to by the file owner (you). We want
to change these permissions so that the file can be executed as a
program. We use the command chmod like we did earlier when
we removed write permissions. Here we are adding (+)
executable permissions (+x).
Now let’s look at the permissions again.
OUTPUT
-rwxr-xr-x 1 dcuser dcuser 0 Oct 25 21:46 bad-reads-script.shNow we see that it says -rwxr-xr-x. The x’s
that are there now tell us we can run it as a program. So, let’s try it!
We’ll need to put ./ at the beginning so the computer knows
to look here in this directory for the program.
The script should run the same way as before, but now we’ve created our very own computer program!
You will learn more about writing scripts in a later lesson.
Moving and Downloading Data
So far, we’ve worked with data that is pre-loaded on the instance in the cloud. Usually, however, most analyses begin with moving data onto the instance. Below we’ll show you some commands to download data onto your instance, or to move data between your computer and the cloud.
Getting data from the cloud
There are two programs that will download data from a remote server
to your local (or remote) machine: wget and
curl. They were designed to do slightly different tasks by
default, so you’ll need to give the programs somewhat different options
to get the same behaviour, but they are mostly interchangeable.
wgetis short for “world wide web get”, and it’s basic function is to download web pages or data at a web address.cURLis a pun, it is supposed to be read as “see URL”, so its basic function is to display webpages or data at a web address.
Which one you need to use mostly depends on your operating system, as most computers will only have one or the other installed by default.
Let’s say you want to download some data from Ensembl. We’re going to
download a very small tab-delimited file that just tells us what data is
available on the Ensembl bacteria server. Before we can start our
download, we need to know whether we’re using curl or
wget.
To see which program you have, type:
which is a BASH program that looks through everything
you have installed, and tells you what folder it is installed to. If it
can’t find the program you asked for, it returns nothing, i.e. gives you
no results.
On Mac OSX, you’ll likely get the following output:
OUTPUT
/usr/bin/curlOUTPUT
$This output means that you have curl installed, but not
wget.
Once you know whether you have curl or
wget, use one of the following commands to download the
file:
or
BASH
$ cd
$ curl -O ftp://ftp.ensemblgenomes.org/pub/release-37/bacteria/species_EnsemblBacteria.txt
Since we wanted to download the file rather than just view
it, we used wget without any modifiers. With
curl however, we had to use the -O flag, which
simultaneously tells curl to download the page instead of
showing it to us and specifies that it should save the
file using the same name it had on the server:
species_EnsemblBacteria.txt
It’s important to note that both curl and
wget download to the computer that the command line belongs
to. So, if you are logged into AWS on the command line and execute the
curl command above in the AWS terminal, the file will be
downloaded to your AWS machine, not your local one.
Moving files between your laptop and your instance
What if the data you need is on your local computer, but you need to get it into the cloud? There are also several ways to do this, but it’s always easier to start the transfer locally. This means if you’re typing into a terminal, the terminal should not be logged into your instance, it should be showing your local computer. If you’re using a transfer program, it needs to be installed on your local machine, not your instance.
Transferring Data Between your Local Machine and the Cloud
If you’re using Linux, Mac OS, or Windows with Git Bash on your local
machine, you can use scp to upload data to your virtual
machine.
scp stands for ‘secure copy protocol’, and is a widely
used UNIX tool for moving files between computers. The simplest way to
use scp is to run it in your local terminal, and use it to
copy a single file:
Note that you are always running scp locally, but that
doesn’t mean that you can only move files from your local
computer. In order to move a file from your local computer to an AWS
instance, the command would look like this:
To move it back to your local computer, you re-order the
to and from fields:
Uploading Data to your Virtual Machine with scp
Open the terminal and use the scp command to upload a
file (e.g. local_file.txt) to the dcuser home directory:
Downloading Data from your Virtual Machine with scp
Let’s download a text file from our remote machine. You should have a file that contains bad reads called ~/shell_data/scripted_bad_reads.txt.
Tip: If you are looking for another (or any really) text file in your home directory to use instead, try:
Download the bad reads file in ~/shell_data/scripted_bad_reads.txt to your home ~/Download directory using the following command (make sure you substitute dcuser@ip.address with your remote login credentials):
BASH
$ scp dcuser@ip.address:/home/dcuser/shell_data/untrimmed_fastq/scripted_bad_reads.txt ~/DownloadsRemember that in both instances, the command is run from your local machine, we’ve just flipped the order of the to and from parts of the command.
If you are using Windows without Git Bash on your local machine, you
can use pscp.exe to upload data to your virtual
machine.
If you’re using a Windows PC without Git Bash, we recommend you use the PSCP program. This program is from the same suite of tools as the PuTTY program we have been using to connect.
- If you haven’t done so, download PSCP from http://the.earth.li/~sgtatham/putty/latest/x86/pscp.exe
- Make sure the PSCP program is somewhere you know on your computer. In this case, your Downloads folder is appropriate.
- Open the windows PowerShell; go to your start menu/search enter the term ‘cmd’; you will be able to start the shell (the shell should start from C:\Users\your-pc-username>).
- Change to the Downloads directory:
- Locate a file on your computer that you wish to upload (be sure you know the path). Then upload it to your remote machine (you will need to know your AMI instance address (which starts with ec2), and login credentials). You will be prompted to enter a password, and then your upload will begin. (make sure you substitute ‘your-pc-username’ for your actual pc username and ‘ec2-54-88-126-85.compute-1.amazonaws.com’ with your AMI instance address)
BASH
C:\User\your-pc-username\Downloads> pscp.exe local_file.txt dcuser@ec2-54-88-126-85.compute-1.amazonaws.com:/home/dcuser/Downloading Data from your Virtual Machine with PSCP
- Follow the instructions in the Upload section to download (if needed) and access the PSCP program (steps 1-3)
- Download the text file to your current working directory (represented by a .) using the following command (make sure you substitute ‘your-pc-username’ for your actual pc username and ‘ec2-54-88-126-85.compute-1.amazonaws.com’ with your AMI instance address)
Key Points
- Scripts are a collection of commands executed together.
- Transferring information to and from virtual and local computers.
Content from Project Organization
Last updated on 2023-05-08 | Edit this page
Overview
Questions
- How can I organize my file system for a new bioinformatics project?
- How can I document my work?
Objectives
- Create a file system for a bioinformatics project.
- Explain what types of files should go in your
docs,data, andresultsdirectories. - Use the
historycommand and a text editor likenanoto document your work on your project.
Getting your project started
Project organization is one of the most important parts of a sequencing project, and yet is often overlooked amidst the excitement of getting a first look at new data. Of course, while it’s best to get yourself organized before you even begin your analyses, it’s never too late to start, either.
You should approach your sequencing project similarly to how you do a biological experiment and this ideally begins with experimental design. We’re going to assume that you’ve already designed a beautiful sequencing experiment to address your biological question, collected appropriate samples, and that you have enough statistical power to answer the questions you’re interested in asking. These steps are all incredibly important, but beyond the scope of our course. For all of those steps (collecting specimens, extracting DNA, prepping your samples) you’ve likely kept a lab notebook that details how and why you did each step. However, the process of documentation doesn’t stop at the sequencer!
Genomics projects can quickly accumulate hundreds of files across tens of folders. Every computational analysis you perform over the course of your project is going to create many files, which can especially become a problem when you’ll inevitably want to run some of those analyses again. For instance, you might have made significant headway into your project, but then have to remember the PCR conditions you used to create your sequencing library months prior.
Other questions might arise along the way:
- What were your best alignment results?
- Which folder were they in: Analysis1, AnalysisRedone, or AnalysisRedone2?
- Which quality cutoff did you use?
- What version of a given program did you implement your analysis in?
Good documentation is key to avoiding this issue, and luckily enough, recording your computational experiments is even easier than recording lab data. Copy/Paste will become your best friend, sensible file names will make your analysis understandable by you and your collaborators, and writing the methods section for your next paper will be easy! Remember that in any given project of yours, it’s worthwhile to consider a future version of yourself as an entirely separate collaborator. The better your documenation is, the more this ‘collaborator’ will feel indebted to you!
With this in mind, let’s have a look at the best practices for documenting your genomics project. Your future self will thank you.
In this exercise we will setup a file system for the project we will be working on during this workshop.
We will start by creating a directory that we can use for the rest of
the workshop. First navigate to your home directory. Then confirm that
you are in the correct directory using the pwd command.
You should see the output:
OUTPUT
/home/dcuser Tip
If you aren’t in your home directory, the easiest way to get there is
to enter the command cd, which always returns you to
home.
Exercise
Use the mkdir command to make the following
directories:
dc_workshopdc_workshop/docsdc_workshop/datadc_workshop/results
Use ls -R to verify that you have created these
directories. The -R option for ls stands for
recursive. This option causes ls to return the contents of
each subdirectory within the directory iteratively.
You should see the following output:
OUTPUT
dc_workshop/:
data  docs  results

dc_workshop/data:

dc_workshop/docs:

dc_workshop/results:
Organizing your files
Before beginning any analysis, it’s important to save a copy of your raw data. The raw data should never be changed. Regardless of how sure you are that you want to carry out a particular data cleaning step, there’s always the chance that you’ll change your mind later or that there will be an error in carrying out the data cleaning and you’ll need to go back a step in the process. Having a raw copy of your data that you never modify guarantees that you will always be able to start over if something goes wrong with your analysis. When starting any analysis, you can make a copy of your raw data file and do your manipulations on that file, rather than the raw version. We learned in a previous episode how to prevent overwriting our raw data files by setting restrictive file permissions.
You can store any results that are generated from your analysis in
the results folder. This guarantees that you won’t confuse
results file and data files in six months or two years when you are
looking back through your files in preparation for publishing your
study.
The docs folder is the place to store any written
analysis of your results, notes about how your analyses were carried
out, and documents related to your eventual publication.
Documenting your activity on the project
When carrying out wet-lab analyses, most scientists work from a written protocol and keep a hard copy of written notes in their lab notebook, including any things they did differently from the written protocol. This detailed record-keeping process is just as important when doing computational analyses. Luckily, it’s even easier to record the steps you’ve carried out computational than it is when working at the bench.
The history command is a convenient way to document all
the commands you have used while analyzing and manipulating your project
files. Let’s document the work we have done on our project so far.
View the commands that you have used so far during this session using
history:
The history likely contains many more commands than you have used for the current project. Let’s view the last several commands that focus on just what we need for this project.
View the last n lines of your history (where n = approximately the last few lines you think relevant). For our example, we will use the last 7:
Exercise
Using your knowledge of the shell, use the append redirect
>> to create a file called
dc_workshop_log_XXXX_XX_XX.sh (Use the four-digit year,
two-digit month, and two digit day, e.g.
dc_workshop_log_2017_10_27.sh)
You may have noticed that your history contains the
history command itself. To remove this redundancy from our
log, let’s use the nano text editor to fix the file:
(Remember to replace the 2017_10_27 with your workshop
date.)
From the nano screen, you can use your cursor to
navigate, type, and delete any redundant lines.
Add a date line and comment to the line where you have created the
directory. Recall that any text on a line after a # is
ignored by bash when evaluating the text as code. For example:
Next, remove any lines of the history that are not relevant by
navigating to those lines and using your delete key. Save your file and
close nano.
Your file should look something like this:
OUTPUT
# 2017_10_27
# Created sample directories for the Data Carpentry workshop
mkdir dc_workshop
mkdir dc_workshop/docs
mkdir dc_workshop/data
mkdir dc_workshop/resultsIf you keep this file up to date, you can use it to re-do your work
on your project if something happens to your results files. To
demonstrate how this works, first delete your dc_workshop
directory and all of its subdirectories. Look at your directory contents
to verify the directory is gone.
OUTPUT
shell_data dc_workshop_log_2017_10_27.shThen run your workshop log file as a bash script. You should see the
dc_workshop directory and all of its subdirectories
reappear.
OUTPUT
shell_data dc_workshop dc_workshop_log_2017_10_27.shIt’s important that we keep our workshop log file outside of our
dc_workshop directory if we want to use it to recreate our
work. It’s also important for us to keep it up to date by regularly
updating with the commands that we used to generate our results
files.
Congratulations! You’ve finished your introduction to using the shell for genomics projects. You now know how to navigate your file system, create, copy, move, and remove files and directories, and automate repetitive tasks using scripts and wildcards. With this solid foundation, you’re ready to move on to apply all of these new skills to carrying out more sophisticated bioinformatics analysis work. Don’t worry if everything doesn’t feel perfectly comfortable yet. We’re going to have many more opportunities for practice as we move forward on our bioinformatics journey!
References
A Quick Guide to Organizing Computational Biology Projects
Key Points
- Spend the time to organize your file system when you start a new project. Your future self will thank you!
- Always save a write-protected copy of your raw data.